Key Takeaways
- Start with projects that address real problems in your home, such as poor storage, outdated finishes, clutter, or inefficient spaces.
- Set a realistic budget before starting and account for materials, tools, replacement parts, and unexpected expenses.
- Refresh existing features instead of replacing them when possible. Painting cabinets, updating hardware, and refinishing furniture can create major improvements at a lower cost.
- Focus on high-impact areas such as walls, kitchens, bathrooms, storage spaces, lighting, and outdoor areas.
- Improve functionality as well as appearance by adding practical storage, better lighting, improved organisation, and more efficient use of available space.
- Take time to measure, prepare surfaces, research materials, and use the right tools to avoid costly mistakes.
- Know your limits and hire qualified professionals for electrical, structural, major plumbing, roofing, or other potentially hazardous work.
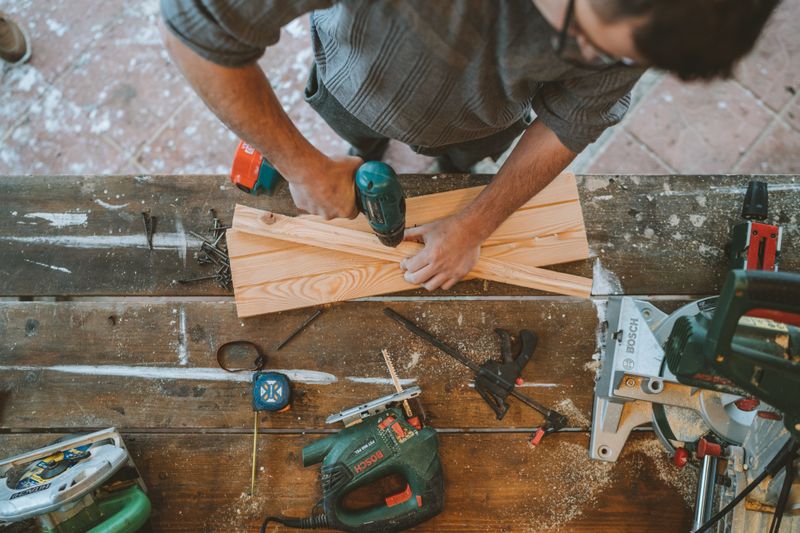
Improving your home does not always require a major renovation budget. Many worthwhile upgrades can be completed with basic tools, affordable materials, and a little time. From refreshing tired walls and improving storage to updating outdoor areas and making rooms more functional, budget-conscious projects can create noticeable changes without putting unnecessary pressure on household finances.
The key is to choose projects that match your abilities, prioritise improvements that solve genuine problems, and avoid spending money simply for the sake of change. With thoughtful planning, even modest DIY work can make a home more comfortable, attractive, efficient, and enjoyable while helping homeowners get more value from the space they already have.
What Should You Consider Before Starting a DIY Project?
Before picking up a paintbrush or purchasing materials, take time to determine what you actually want to accomplish. The most successful budget projects usually begin with a clear problem rather than an impulse purchase. A room might feel dark, storage might be inadequate, an outdoor area might be underused, or certain fixtures may look dated. Identifying the underlying issue helps you select an improvement that delivers a meaningful result instead of creating unnecessary expense.
Your available time, skills, tools, and budget should also influence the project you choose. A simple weekend update can be an excellent starting point if you have limited DIY experience, while more involved work may require additional research or professional assistance. Good planning also helps prevent the common mistake of starting several projects at once and leaving each one unfinished.
Set a realistic budget
Even inexpensive projects can become costly when purchases are made without a plan. Establish a maximum spending limit before you begin, then divide it between materials, tools, replacement parts, and contingency costs.
A small contingency allowance is particularly useful because older homes can reveal unexpected problems once work begins. You may discover damaged timber, outdated wiring, water damage, or surfaces that need more preparation than expected.
Work out what you already have
Check your garage, shed, cupboards, and storage areas before buying anything. You may already own brushes, rollers, screwdrivers, drills, sandpaper, measuring tools, ladders, or leftover materials from previous projects.
Borrowing specialised tools from friends or family can also reduce costs. If you expect to use a particular tool regularly, purchasing one may make sense, but avoid buying expensive equipment for a single small job.
Know when DIY is not appropriate
Budget-conscious does not mean doing everything yourself. Electrical work, major plumbing alterations, structural changes, roofing work, gas-related tasks, and other regulated or high-risk jobs may require qualified professionals depending on local requirements.
A useful rule is to DIY where the work is primarily cosmetic, organisational, or relatively straightforward, and seek professional help when mistakes could create significant safety, structural, or compliance problems.
How Can You Refresh Walls Without Spending Much?
Walls have a major influence on how a room looks and feels, which makes them one of the most cost-effective places to begin. You do not necessarily need expensive wallpaper, feature panels, or a complete redesign to make a noticeable difference. A carefully chosen paint colour, properly prepared surface, or simple decorative treatment can make an ordinary room feel cleaner and more intentional. Because paint and basic decorating supplies are relatively accessible, wall improvements are also suitable for homeowners who want to build confidence with DIY work.
Preparation is often more important than the final colour. Filling small holes, smoothing imperfections, cleaning dirty surfaces, protecting floors, and using the appropriate primer can significantly improve the finished result. Taking your time during preparation can help an inexpensive project look much more polished.
Repaint a tired room
A fresh coat of paint can dramatically change a space without requiring expensive materials. Consider refreshing living rooms, bedrooms, hallways, home offices, or other areas where the existing finish looks worn.
You do not always need to repaint every wall. Painting one feature wall or refreshing a particularly tired section can reduce material costs while still creating visual impact.
Update trim and doors
Door frames, skirting boards, window trim, and interior doors can become scuffed and dull over time. Cleaning, lightly sanding, priming where appropriate, and applying a fresh finish can make these details look considerably newer.
If the existing doors are structurally sound, repainting them can be far less expensive than replacing them. Updating the hardware at the same time can further improve their appearance.
Create an inexpensive feature wall
A feature wall can add personality without requiring an entire room makeover. Paint is usually the simplest approach, but removable wallpaper or carefully installed decorative elements can also work.
Choose the wall strategically. A wall behind a bed, sofa, dining table, or desk can naturally become the room’s visual focal point.
Use inexpensive wall décor
Artwork does not have to be expensive to make a room feel finished. Framed photographs, prints, mirrors, children’s artwork, handmade pieces, or carefully arranged collections can add character.
Instead of filling every wall, focus on creating a few balanced arrangements. A smaller number of thoughtfully positioned pieces can often look more sophisticated than a room crowded with decorations.
Which Small Kitchen Updates Can Make a Big Difference?
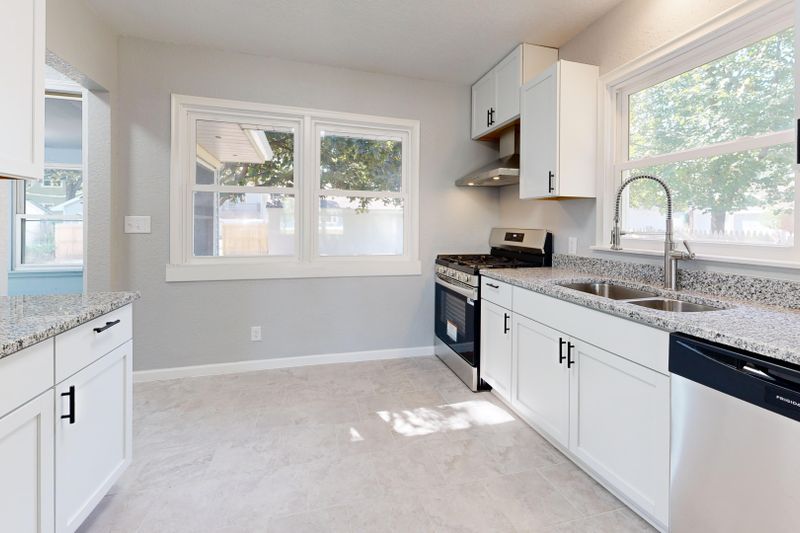
Kitchens can be among the most expensive rooms to renovate, but a full renovation is rarely necessary to make the space feel fresher. Many kitchens look dated because of small visual details rather than fundamental problems with their layout or structure. Updating cabinet finishes, handles, lighting, splashback areas, and storage can provide a significant improvement while preserving the existing cabinetry and major appliances.
The most economical strategy is to keep anything that is still functional. Replacing sound cabinets simply because they look old can consume a large portion of the budget. Instead, concentrate on surfaces and fittings that are visible every day. A few coordinated changes can create the impression of a much larger makeover.
Replace cabinet handles
Cabinet handles are small, but they can have a surprisingly strong visual effect. Replacing dated knobs or pulls with modern alternatives can change the overall character of a kitchen without altering the cabinets themselves.
Before purchasing replacements, measure the distance between existing screw holes. Choosing hardware that fits the current holes can save you from filling, drilling, and repainting cabinet doors.
Refresh cabinet fronts
If your cabinets are structurally sound, consider cleaning and repainting them rather than replacing them. This project requires careful preparation, but the potential savings can be substantial.
Clean surfaces thoroughly, repair obvious imperfections, sand appropriately, and use a suitable primer and finish. Allow adequate drying time between coats rather than rushing the process.
Improve cupboard organisation
Better organisation can make a kitchen feel larger and more functional without changing its footprint. Simple shelf risers, drawer dividers, hooks, baskets, and labelled containers can help make better use of existing storage.
Look for wasted vertical space and difficult-to-reach corners. Small organisational changes can make frequently used items easier to access while reducing clutter on benches.
Add inexpensive open shelving
Open shelving can provide useful storage and a decorative element at the same time. Reclaimed timber or affordable shelving boards can sometimes be used for this purpose, provided they are suitable for the intended load and environment.
Keep the display restrained. Too many objects can make open shelving look cluttered, so use it for frequently used items or a small selection of attractive kitchenware.
What Bathroom Improvements Can You Do Yourself?
Bathrooms are another area where modest changes can deliver noticeable results. While major plumbing alterations and waterproofing work should be approached carefully and may require qualified tradespeople, many cosmetic improvements are within the capabilities of homeowners. Replacing tired accessories, improving storage, refreshing surfaces, and addressing minor visual problems can make the room feel cleaner and more contemporary.
Because bathrooms are relatively small, inexpensive details can have an outsized impact. Coordinating the finish of handles, hooks, shelves, mirrors, and other accessories can create a more unified appearance. Good cleaning and maintenance should also be part of the project rather than an afterthought.
Replace cabinet and drawer hardware
Old bathroom vanity handles can quickly make a room look dated. Swapping them for coordinated hardware is a straightforward update that requires minimal materials.
Choose finishes that work with existing taps, shower fittings, towel rails, or other visible elements. Consistency helps inexpensive upgrades appear more deliberate.
Upgrade the mirror
A dated mirror can dominate a bathroom visually. If the existing mirror is in good condition, consider adding a simple frame or replacing it with an affordable style that better suits the room.
Measure carefully before purchasing. The replacement should be appropriately sized for the vanity and surrounding wall space.
Improve storage
Bathrooms often suffer from insufficient storage, but additional cabinetry is not always necessary. Floating shelves, baskets, hooks, over-door organisers, and compact wall-mounted storage can help keep everyday items under control.
Keep frequently used products accessible while storing less attractive items out of sight where possible. A tidy bathroom can immediately feel more spacious.
Refresh grout and sealants
Discoloured grout can make an otherwise clean bathroom look neglected. Thorough cleaning may restore some surfaces, while suitable grout products can help improve the appearance of more worn areas.
Be cautious around waterproofing and sealant work. If you suspect water is getting behind a surface or there is evidence of a leak, address the underlying problem rather than simply covering it cosmetically.
How Can You Improve Storage Without Building New Cabinets?
Storage is one of the most practical areas for DIY improvement because better organisation can change how a home functions every day. You do not necessarily need to construct new built-in cabinetry to gain useful storage. Many homes contain underused walls, corners, doors, shelves, and vertical spaces that can be adapted with relatively inexpensive solutions.
Start by looking at what causes the clutter. If frequently used objects lack a designated place, adding storage may help. If there is simply too much stuff, however, more storage may only postpone the problem. Decluttering should therefore come before purchasing organisational products.
Use vertical space
Walls can provide valuable storage without taking up much floor area. Hooks, pegboards, shelves, and wall-mounted racks can be useful in kitchens, garages, laundry rooms, home offices, and entryways.
Install wall-mounted items securely and make sure the fixings are appropriate for the wall type and expected weight.
Make better use of doors
The backs of doors are often overlooked. Hanging organisers can hold cleaning supplies, accessories, craft materials, pantry items, or other lightweight belongings.
Avoid overloading doors, particularly lightweight internal doors. The storage system should be appropriate for the door’s construction and hardware.
Organise the garage or shed
A garage or shed can quickly become unusable when tools and equipment are scattered across the floor. Simple hooks, shelves, labelled containers, and wall-mounted storage can create a more functional workspace.
Group similar items together and keep frequently used tools within easy reach. Seasonal or rarely used belongings can be placed higher or further back.
Create a dedicated entryway area
A small entryway station can help prevent shoes, bags, keys, and jackets from spreading throughout the house. A few hooks, a narrow shelf, baskets, and a small bench can be enough to create a useful drop zone.
This is one of the practical ways to improve your home because it addresses everyday clutter rather than simply changing the appearance of a room.
Which Outdoor Projects Can You Complete on a Budget?
Outdoor spaces offer plenty of opportunities for affordable improvements, particularly when the existing structure is still usable. A neglected backyard, patio, balcony, or entry area may need cleaning, organisation, planting, lighting, or basic repairs rather than an expensive landscape redesign. Small improvements can make an outdoor area more inviting and encourage your household to use it more frequently.
When planning outdoor projects, consider durability as well as initial cost. Cheap materials that deteriorate quickly may ultimately cost more than slightly better-quality options. Look for practical solutions that can handle local weather conditions and require manageable maintenance.
Clean and refresh outdoor surfaces
Pressure washing or carefully cleaning patios, paths, fences, walls, and outdoor furniture can produce a noticeable visual improvement. Dirt and weathering can make otherwise sound surfaces appear much older than they are.
Use cleaning methods appropriate for the material. Excessive pressure or unsuitable chemicals can damage timber, paint, masonry, and other surfaces.
Build simple garden beds
A basic garden bed can add structure and colour to an outdoor area. Depending on your space and local conditions, you might use affordable timber, masonry materials, containers, or existing garden borders.
Choose plants based on sunlight, soil, water availability, and maintenance requirements rather than appearance alone. Low-maintenance plants can reduce long-term costs.
Refresh outdoor furniture
Before buying new outdoor furniture, inspect what you already have. Cleaning, sanding, repainting, staining, or replacing cushions can extend the life of existing pieces.
If furniture is structurally sound, a cosmetic refresh may provide much of the benefit of replacement at a fraction of the cost.
Add simple outdoor lighting
Affordable outdoor lighting can improve ambience and help define areas such as pathways, patios, entertaining spaces, and garden beds. Solar-powered options can be convenient where suitable.
Position lighting thoughtfully rather than installing large quantities. A few well-placed lights can provide a stronger visual effect than an overcrowded arrangement.
What Energy-Efficient Updates Can You Handle Yourself?
Energy efficiency is often associated with expensive appliances, insulation upgrades, solar systems, or major building work, but homeowners can also make smaller improvements that support a more comfortable and efficient house. Reducing drafts, improving lighting, managing sunlight, and maintaining equipment can all contribute to better household performance.
The financial benefit of an energy-related project depends on the home, climate, existing equipment, and how the household uses energy. Avoid assuming that every upgrade will pay for itself quickly. Instead, focus on improvements that are affordable, appropriate for the property, and likely to provide practical benefits over time.
Replace inefficient light bulbs
Changing older bulbs to energy-efficient alternatives can be a simple place to begin. Prioritise frequently used lights to make the most of the change.
Consider brightness, colour temperature, fitting type, and room function when choosing replacements. A warmer light may suit bedrooms and living spaces, while brighter lighting can work better in task-oriented areas.
Reduce drafts
Gaps around doors and windows can allow conditioned air to escape and outdoor air to enter. Weatherstripping and suitable door seals can help address minor drafts at relatively low cost.
Inspect the source of the draft before applying a seal. The appropriate solution depends on the location and size of the gap.
Improve window coverings
Curtains, blinds, shades, and other coverings can help manage sunlight and indoor temperatures. You do not always need premium window treatments to achieve a useful improvement.
Use window coverings strategically based on the direction of sunlight and the room’s needs. In warmer periods, reducing direct solar heat gain can be particularly useful.
Maintain heating and cooling equipment
Simple maintenance can help household equipment operate more effectively. Keep filters clean where the manufacturer’s instructions permit it, remove obstructions around relevant equipment, and follow recommended maintenance schedules.
Never disassemble or modify systems that require qualified servicing simply to save money. Preventive maintenance is generally a better budget strategy than waiting for an expensive failure.
How Can You Make Rooms Feel More Expensive Without Spending More?
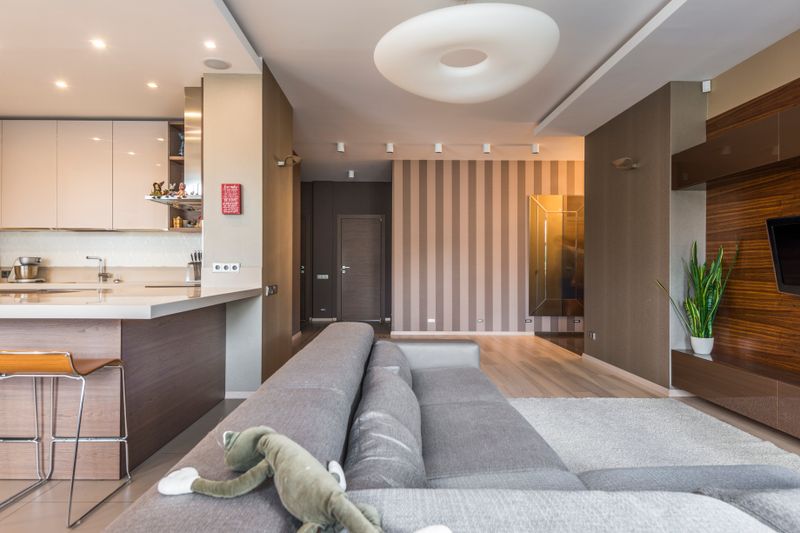
A room can feel polished without containing expensive furniture or designer finishes. Much of what makes a space appear well-designed comes from proportion, consistency, cleanliness, lighting, arrangement, and attention to detail. This means homeowners can often improve the overall appearance of their property without making large purchases.
Rather than trying to imitate a luxury interior exactly, identify the elements that make the space feel unfinished. Clutter, mismatched finishes, poor lighting, damaged surfaces, and overcrowded furniture can undermine even expensive décor. Addressing these issues can produce a more noticeable improvement than simply adding new decorative objects.
Rearrange your furniture
Furniture placement can completely change how a room feels. Move pieces away from unnecessary obstructions, improve walking paths, and create clear functional zones.
Do not assume that furniture must sit against every wall. Depending on the room, creating a more intentional arrangement can make the space feel larger and more comfortable.
Improve lighting
A room usually benefits from more than one light source. Combine overhead lighting with lamps, task lighting, or accent lighting where appropriate.
You can sometimes create a significant improvement simply by changing bulbs, repositioning lamps, or adding an affordable light fixture that works with the existing electrical setup.
Declutter visible surfaces
Clear benches, tables, shelves, and floors can make a home look calmer and more spacious. Keep frequently used items accessible, but give everything else a designated storage location.
Decluttering is particularly useful before spending money on decorative improvements because it allows you to see what the room actually needs.
Coordinate small details
Matching or complementing finishes can make inexpensive items appear more cohesive. Consider handles, frames, cushions, storage baskets, textiles, and other accessories as part of a broader visual scheme.
You do not need everything to match perfectly. A limited palette of materials, colours, and finishes can create enough consistency without becoming overly uniform.
Which DIY Projects Should You Prioritise First?
When you have several ideas competing for attention, prioritisation can help you spend your money where it matters most. The most worthwhile projects are not necessarily the ones that produce the biggest visual transformation. Improvements that address safety, maintenance, comfort, functionality, or recurring household frustrations may provide greater long-term value.
Think about how frequently you interact with the problem. A broken storage system used every day may deserve attention before a decorative feature that simply looks attractive. Likewise, a drafty door or poorly functioning fixture may be a more sensible investment than a purely cosmetic upgrade.
Start with problems you notice every day
Daily frustrations are useful indicators of where to spend your DIY budget. Poor storage, awkward layouts, damaged finishes, insufficient lighting, and clutter can affect your experience of the home repeatedly.
Fixing these issues can make the property feel better even if visitors never notice the changes.
Choose projects with manageable costs
Avoid starting a project that requires a long list of expensive materials unless you have already confirmed the total cost. Break larger improvements into smaller stages where possible.
For example, instead of renovating an entire room at once, you could refresh the walls first, improve lighting later, then address storage when your budget allows.
Consider maintenance requirements
An attractive improvement that requires constant upkeep may not be suitable for every household. Consider how much cleaning, repainting, watering, sealing, or other maintenance a project will require.
Choose solutions that fit your available time as well as your finances. A simpler project that you can maintain consistently may be more valuable than an elaborate installation that quickly becomes neglected.
Protect the features that are already working
One of the easiest ways to control costs is to avoid replacing things unnecessarily. Sound cabinetry, doors, furniture, flooring, fixtures, and outdoor structures may only need cleaning, repair, refinishing, or minor updates.
Keeping existing materials in use reduces waste and allows your budget to focus on areas where improvement is genuinely needed.
How Can You Avoid Common Budget DIY Mistakes?
DIY projects can save money, but only when they are approached realistically. Poor preparation, incorrect measurements, unsuitable materials, and rushed work can turn a low-cost project into an expensive repair. Homeowners sometimes underestimate the value of planning because the project itself appears simple, only to discover that correcting mistakes takes more time and money than doing the job carefully from the beginning.
A budget project should therefore include more than the purchase price of materials. Consider preparation, tools, waste, replacement parts, safety equipment, and the possibility that the project may take longer than expected. A few minutes of research before starting can prevent many avoidable problems.
Do not skip preparation
Cleaning, measuring, sanding, filling, priming, protecting nearby surfaces, and gathering the correct tools may not be the most exciting parts of DIY work, but they often determine the quality of the final result.
Rushing preparation can lead to peeling paint, uneven finishes, damaged surfaces, incorrect cuts, and other problems that require additional work.
Avoid buying materials before measuring
Measure walls, floors, cabinets, windows, storage areas, and other relevant spaces carefully. Where possible, measure more than once and record the dimensions before purchasing materials.
Buying too much creates unnecessary expense, while buying too little can lead to mismatched materials or additional trips to the store.
Do not chase trends blindly
A project can become expensive when homeowners constantly change colours, finishes, fixtures, or designs because of short-lived trends. Choose improvements that suit the architecture of the property and your household’s needs.
Timeless, practical choices can also make future maintenance and replacement easier.
Know when to stop
DIY can be rewarding, but not every project should be completed solely because you started it. If you uncover structural damage, significant moisture problems, hazardous materials, unsafe wiring, or another serious issue, pause and seek appropriate advice.
Spending money on professional assistance when necessary is not a failure of DIY. It can be the most responsible way to protect your home and your budget.
What Is the Best Way to Plan Your Next Home Improvement?
The best budget projects are usually those that combine affordability with a clear purpose. Instead of treating DIY as a way to constantly change the appearance of your home, think of it as a practical method for maintaining, improving, organising, and personalising the space. This approach makes it easier to decide which projects deserve your time and money and which can wait.
A simple project plan can also keep costs under control. Choose one area, identify the problem, determine the desired outcome, estimate the materials, check the tools you have available, and decide whether the work is appropriate for your skill level. Once the project is complete, evaluate the result before moving on to another improvement.
Create a project priority list
Write down every improvement you would like to make, then divide the list into categories such as urgent repairs, functional upgrades, cosmetic changes, and long-term projects.
This makes it easier to distinguish genuine needs from projects that are simply appealing at the moment.
Set a spending limit for each project
Give each project its own budget rather than treating your entire home improvement fund as one pool. This can prevent one project from consuming money intended for other priorities.
If the project exceeds your limit because of an unexpected problem, reassess whether the additional expense is necessary before continuing.
Complete one project before starting another
Finishing a project provides a clearer sense of progress and makes it easier to track your spending. It also prevents your home from becoming a collection of half-completed improvements.
Once one project is finished, you can assess what worked, what you learned, and what tools or materials might be useful for the next one.
Keep records of your work
Take photographs before and after each project and keep notes about products, measurements, colours, materials, and repairs. These records can be useful when you need to repeat an update or repair something later.
They can also help you understand which improvements have provided the greatest benefit relative to their cost.
How Can Small DIY Projects Make a Lasting Difference?
Affordable home improvement is ultimately less about how much money you spend and more about how deliberately you use your available resources. A freshly painted wall, better-organised cupboard, updated cabinet hardware, refreshed outdoor furniture, improved lighting, or a more functional storage system may each seem like a small change on its own. Together, however, these improvements can significantly affect how comfortable and usable a home feels.
The most successful DIY projects are those that respond to the actual needs of the household. They make everyday routines easier, address visible wear, improve neglected spaces, or help homeowners get more value from rooms they already have. By choosing projects carefully, homeowners can gradually improve their properties without taking on the financial and logistical burden of a major renovation.
A sensible approach is to start small, learn as you go, and invest more only when a project genuinely warrants it. Use materials efficiently, reuse what remains in good condition, and never compromise safety simply to reduce costs. With realistic expectations and careful planning, DIY can become a practical part of maintaining and improving a home over time.
Rather than waiting until you can afford a complete renovation, look around your property and identify one improvement that would make daily life better. It could be as simple as repainting a tired room, organising an overcrowded cupboard, refreshing an outdoor space, or replacing a few outdated fixtures. Small, consistent changes can add up to a home that feels more functional, comfortable, and personal without requiring an oversized budget.